Facebook verification for your business page can bring you several benefits. The foremost one is that it exhumes the authenticity and credibility of the business page. That is why many business owners are scrambling to get the blue tick.
Page visibility is another reason people look out for the blue tick. But it does not come easy. Issues like greyed start verification button or ineligibility for verification are very common with users who have attempted to get verified. The badge comes with perks and exclusive features provided by Facebook. Such are the analytics, insight, and promotional options to help you gain more followers and engagement.
Having the verification badge for your page is simple but not simple because there is a procedure to follow. The process requires certain information which would be the point of qualification for the verification badge.
Let’s get started with how to get the verification badge for your Facebook business page.
How To Get Your Business Page Verified On Facebook
To get your page verified on Facebook, follow this step-by-step guide.
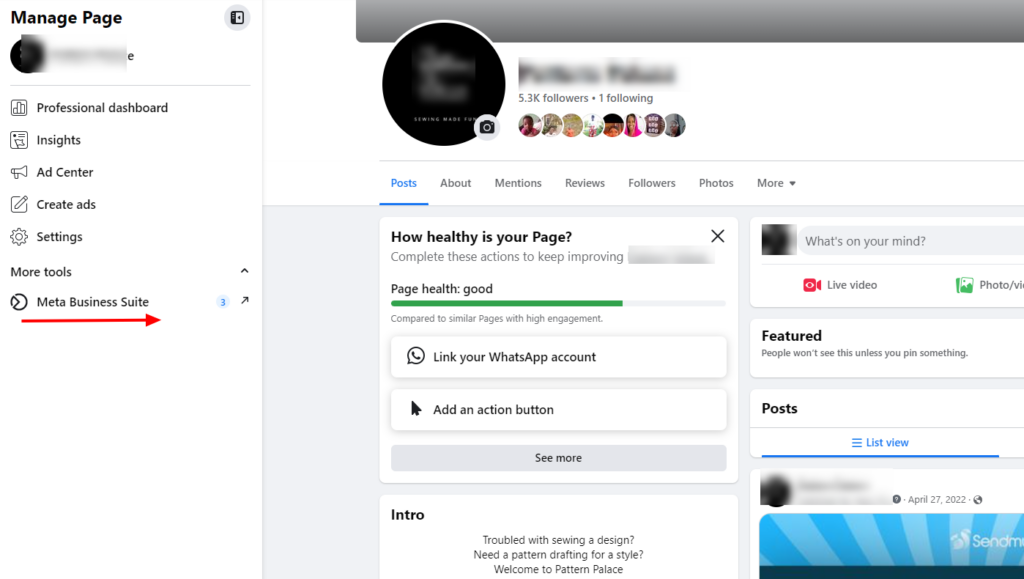
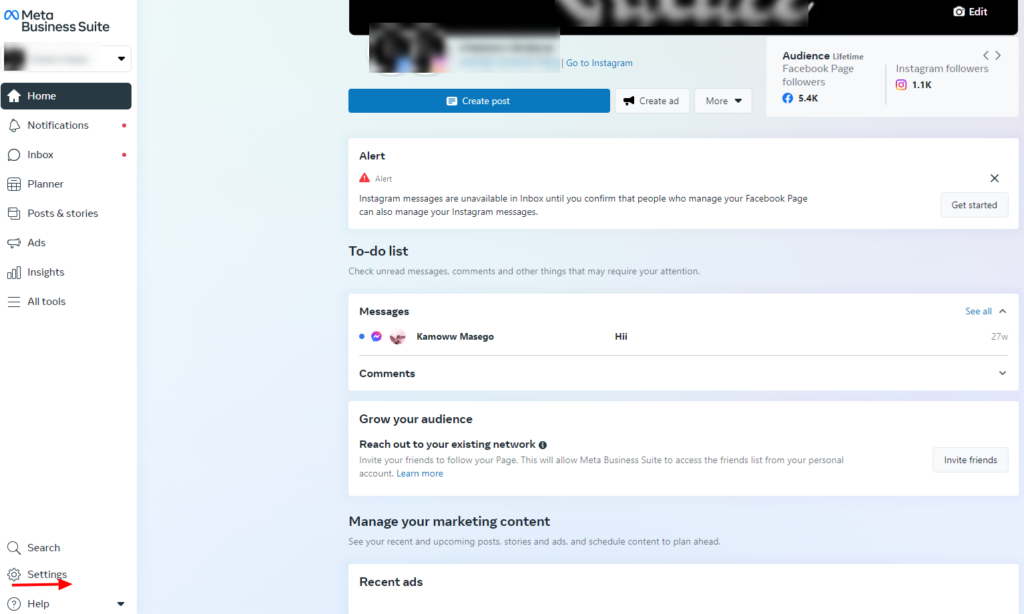
1. On your Facebook page for the profile or page you want to verify, click the Meta Business Suite on the side menu bar
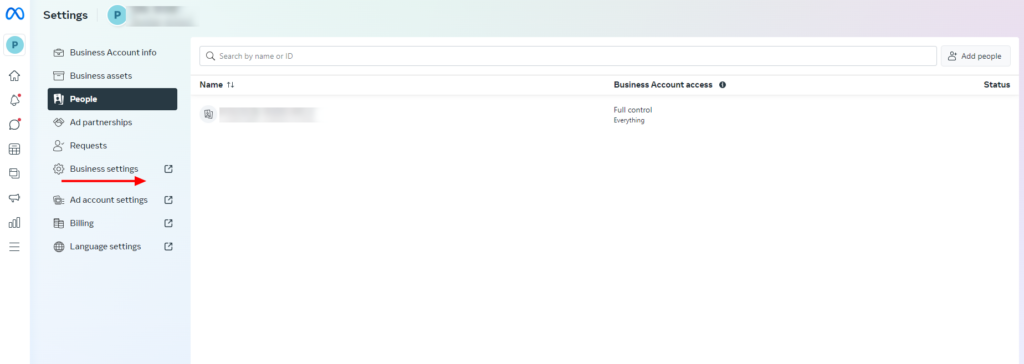
2. Click Settings on the sidebar, and you will be directed to the business.facebook.com page. From here click the Business settings button.
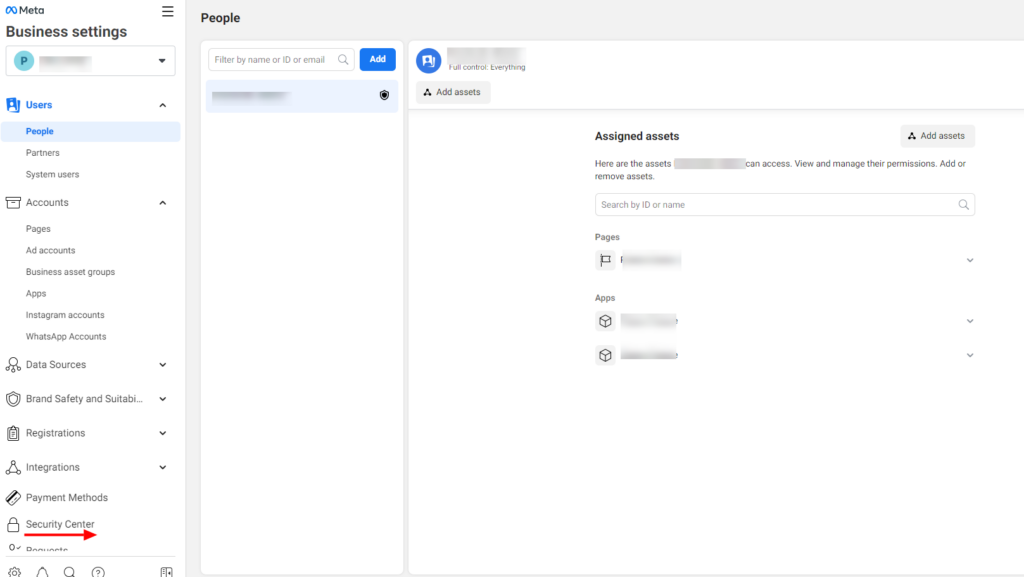
3. You will be redirected to the Business Settings page. On the sidebar, click the Security Center button.
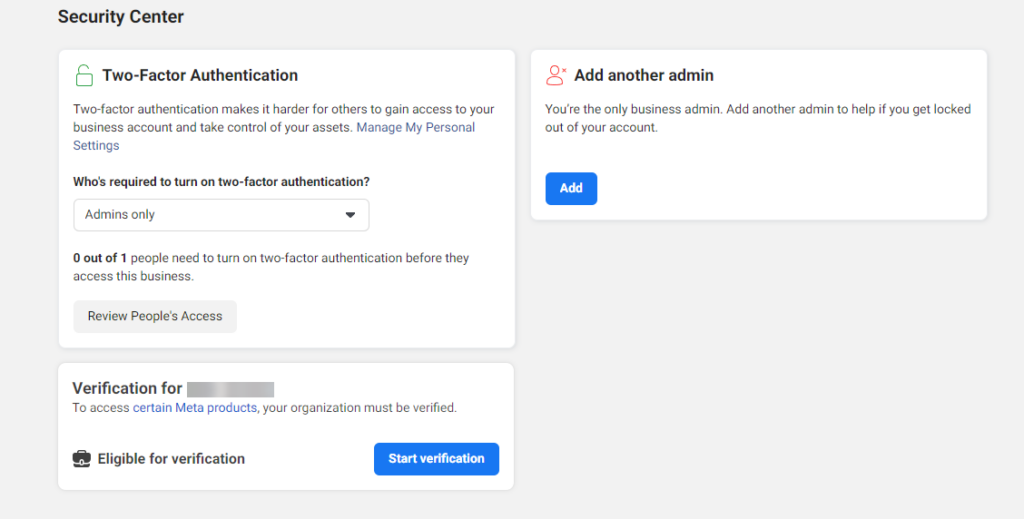
4. Once you click the Security Center button, you will see the verification page where you either see the “Start verification”, “Ineligible for verification”, or the “Start verification” button greyed.
What You May Encounter During The Verification Process
When trying to apply for Facebook verification, there is a starting point where you get to know if you can begin the process or not. And this depends on how Facebook views your page or profile’s engagement.
Ineligible for verification
- Start verification button greyed
- Start verification button is not visible
- Ineligible for verification
The verification badge on your Facebook profile shows that you are authentic hence the reason why most businesses go after it. However, currently, Facebook has limited verification for business pages.
You can only get your Facebook page verified if it is a notable personal page. Other activities like post engagement, consistent content creation, and authenticity are also a factor. Verifying your Facebook profile or page requires you to subscribe to Meta Verified.
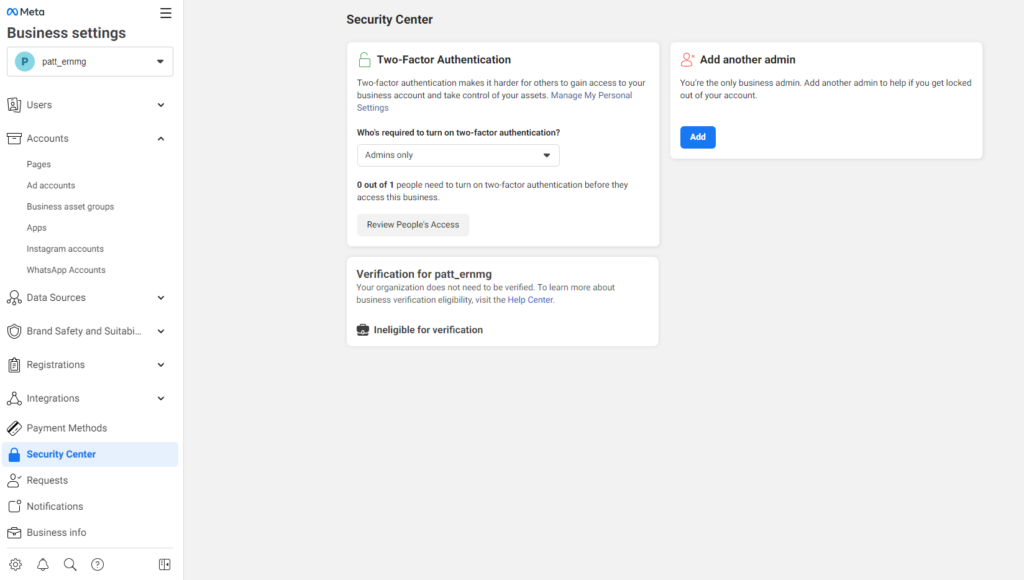
For some business pages when you attempt to get verified, you might see that you’re ineligible for verification. This can be due to the above reasons as highlighted by Facebook.
Although, there is a chance that even when you see the ineligible button on your verification page, you can still get to apply if your page is notable and of public interest by filling out this form or going through this process we are about to discuss to begin the verification process.
image
Requirements for eligibility
1. Unique: Just one version of this business or individual profile must exist on Facebook.
2. Complete profile: Necessary profile details like photo, contact, address, and recent post must be available.
3. Notable: The profile should be for a well-known or often searched person or brand.
4. Authentic: The profile must be a certified or registered entity.
Start verification button greyed
For Facebook pages that fit into the verification requirement of Meta Verified, there are times when you can have a different experience with the verification button. The “Start verification” button might be greyed out and not clickable.
What you need to do to get these issues sorted will be explained in this article shortly. Just follow through the steps religiously.
While there are varying experiences from people who have tried to get the verification badge on their Facebook business account but have the start verification button grayed out. One of the popular solutions is to create an app and link it to the Facebook page so you can access the developers’ feature to be eligible for verification.
This is so because Meta Verified has categorized the reason for eligibility of verification for business pages which are developer features for businesses with apps, Meta business partners, instant games, news pages, and WhatsApp business API.
For the developer feature that requires that the page owns an app, you need to undergo the app review before you can access the start verification button.
Another possible way to sort this issue is to enable two-factor authentication for the business page. This is a probable solution but some users could not get past that stage because Facebook does not see their page as eligible.
But the good news is that we have found a way around helping you get your Facebook page verified by solving the ineligibility issues or greyed verification button issues.
How To Solve Ineligibility and Greyed Start Verification Issues
Here is a quick solution to help you solve any verification issues mentioned at the beginning of this post.
To take the gray off the start verification button and make it clickable, you can follow through this step to create a dummy app using the developers’ feature as an eligibility measure for verification.
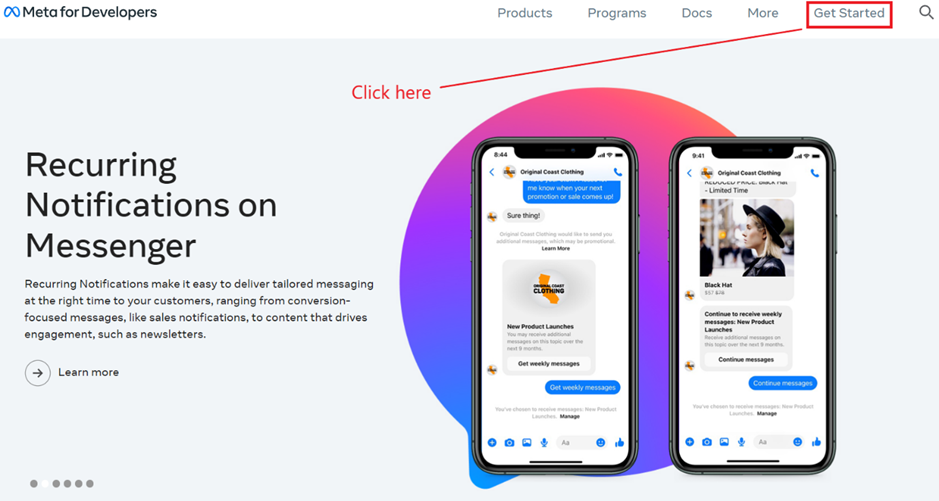
1. Visit www.developers.facebook.com to create a developer’s account. If it is your first time, click the “Get started” button and sign up with the email address linked to your Facebook account.
The images below are a guide on how to create an account on Meta For Developers.
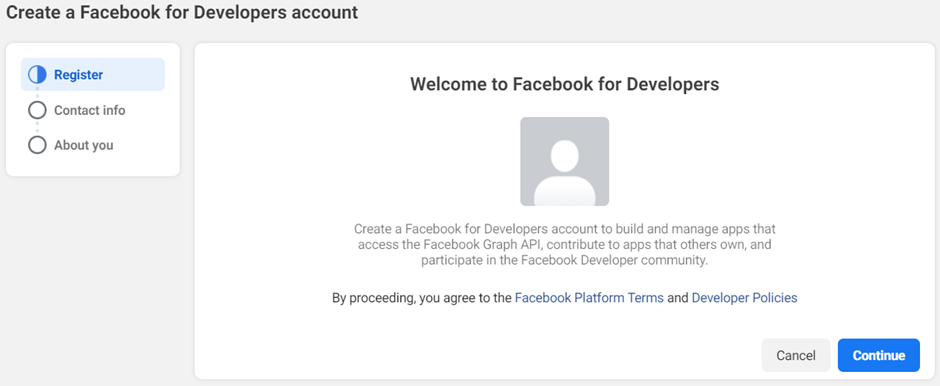
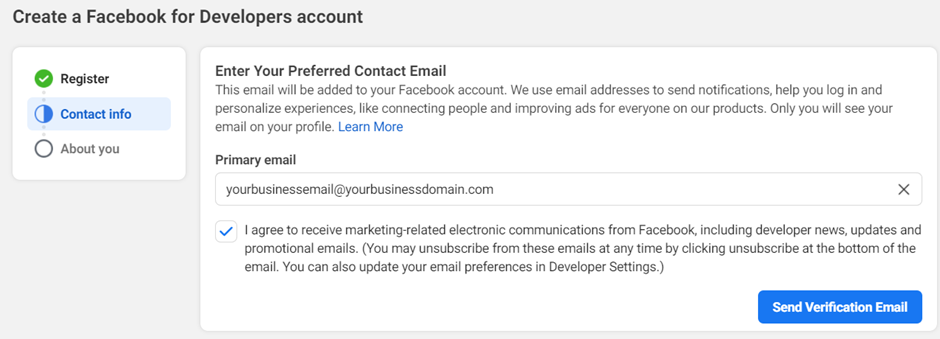
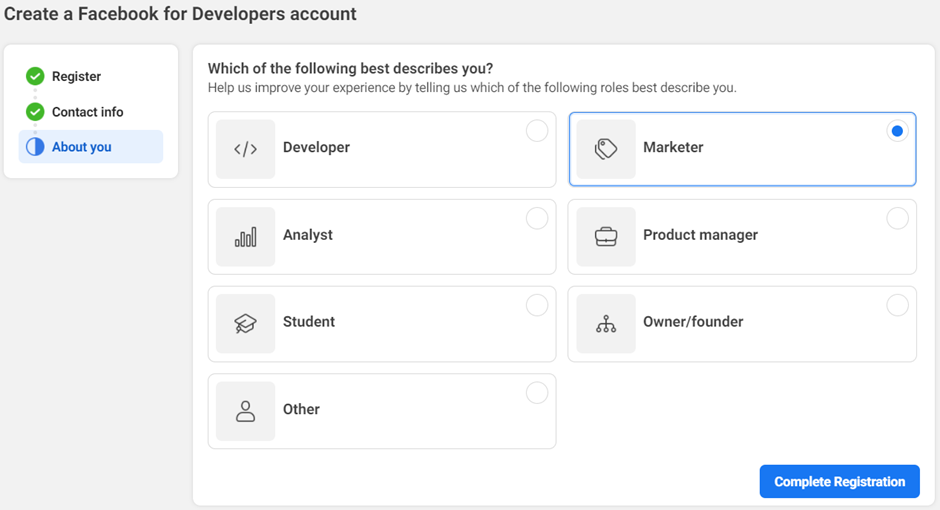
2. If you are signed in already, click the My Apps button to see your profile. At the top right of the page where your profile avatar is, click to choose the Facebook page you want to create an app for.
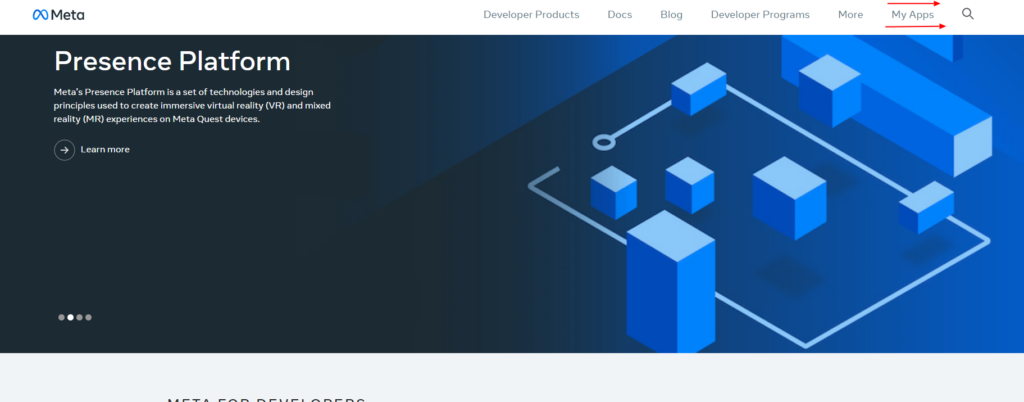
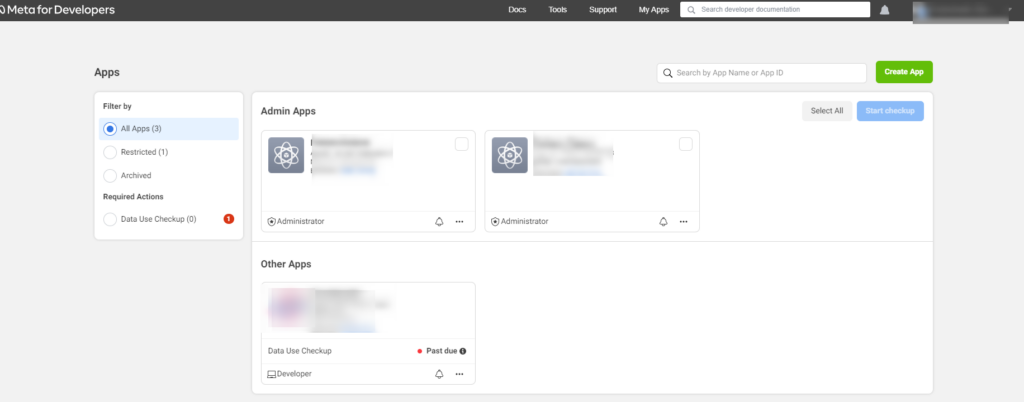
3. Click the create app button and choose the login method for the app
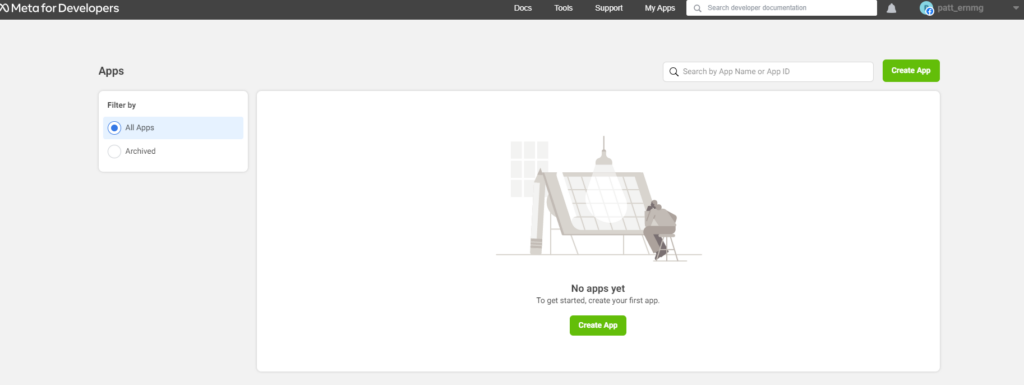
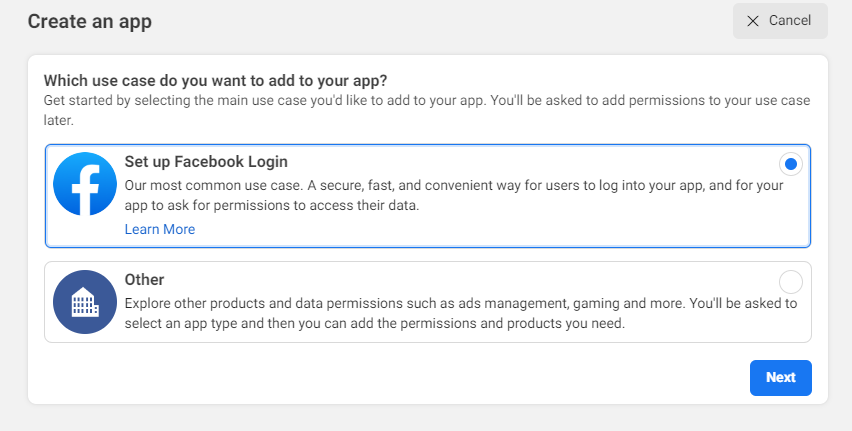
4. Choose the phone type and reason for creating the app
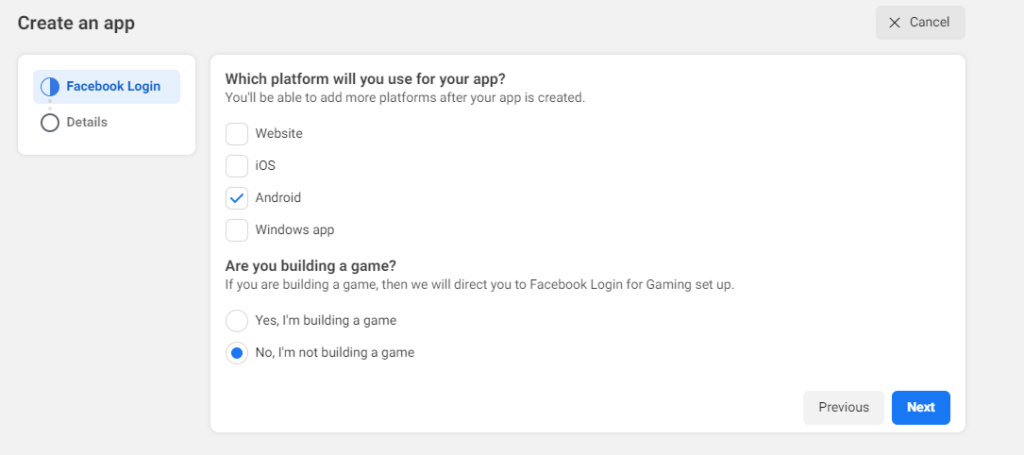
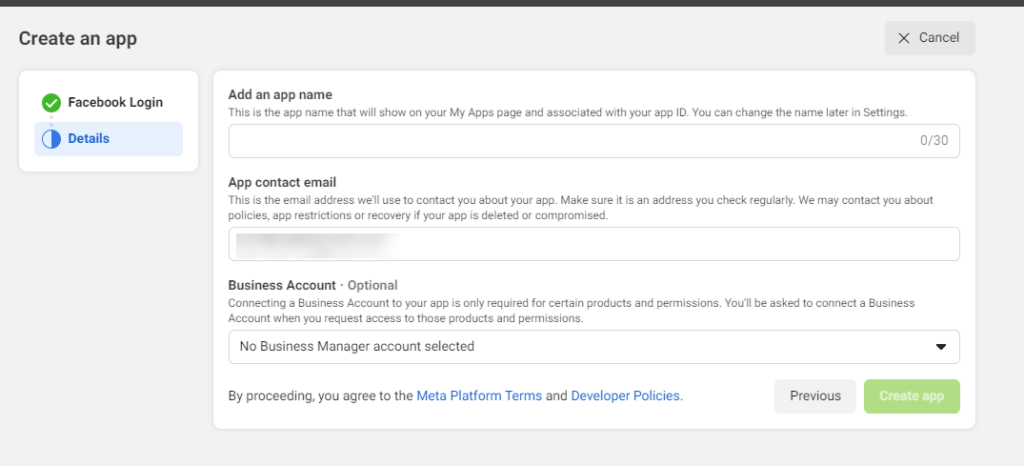
5. Add the app name, contact email, and business page you are trying to verify. Then click the create app button.
5 Bookkeeping Tips For Small Business Owners
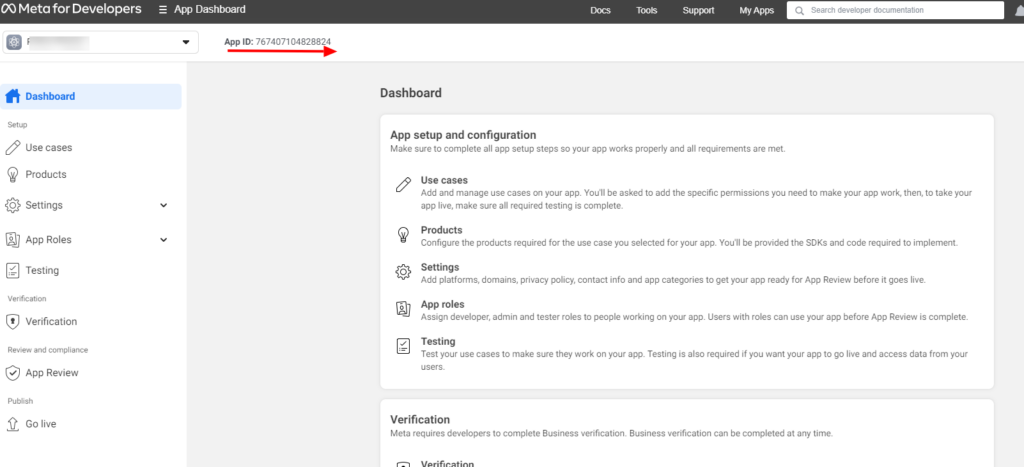
6. You will be redirected to the app page. Copy the App ID at the top left of the page and go to the Business Settings page (https://business.facebook.com/settings/)
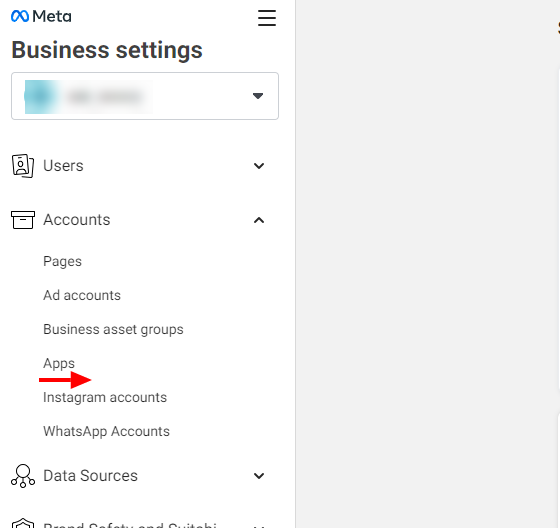
7. Click on “Accounts” you will see the dropdown, then click “Apps”
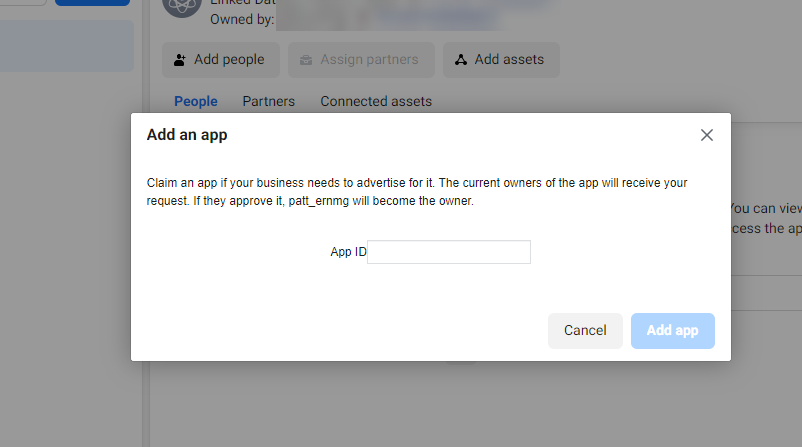
8. Click the Add button and a drop-down will pop up, choose “Connect ID app”
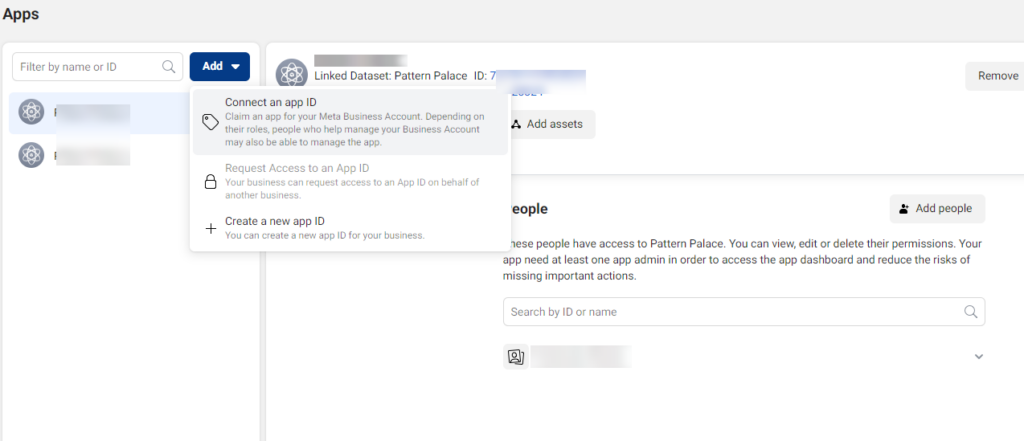
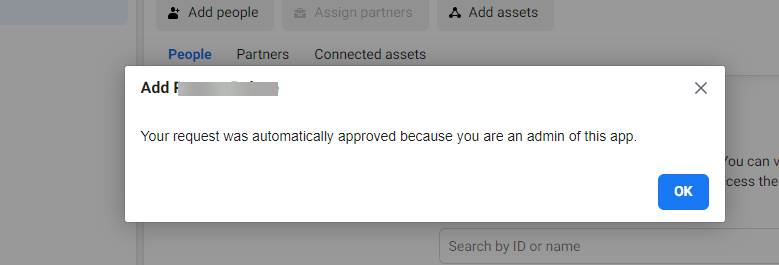
9. Enter the App ID copied in step 6 and submit. You will get a pop-up that your request has been granted as an admin of the app.
10. Go to the “Security Center” page, you will see the start verification button displayed and clickable.
Follow through the process by clicking the start verification button to begin the verification process.
