As a business owner or individual looking to increase your online following and give publicity to your brand, social media ads are the pipeline to attracting customers or followers to your page.
With promotion on platforms like Facebook, you can get your page or profile more visibility with paid advertisement. That is why you need to understand how to use and create Facebook ads.
In this blog post, you will be able to sight critical points to notice and optimize when creating a Facebook ad, a proper guide to creating one, and other needed knowledge.
Step-by-Step Guide To Facebook Ads
1. To create a Facebook ad, you need to have access to a Facebook page or profile as an admin, editor, or advertiser.
2. The next step is to create an ad manager account to help you keep track of your ads and other measures like payment, ad result, cost per result, and so on.
If it is your first time on the Facebook ad manager page, click the start now button to lead you to the ad creation page. You might to sign in to your Facebook account if you have not done that on the device before
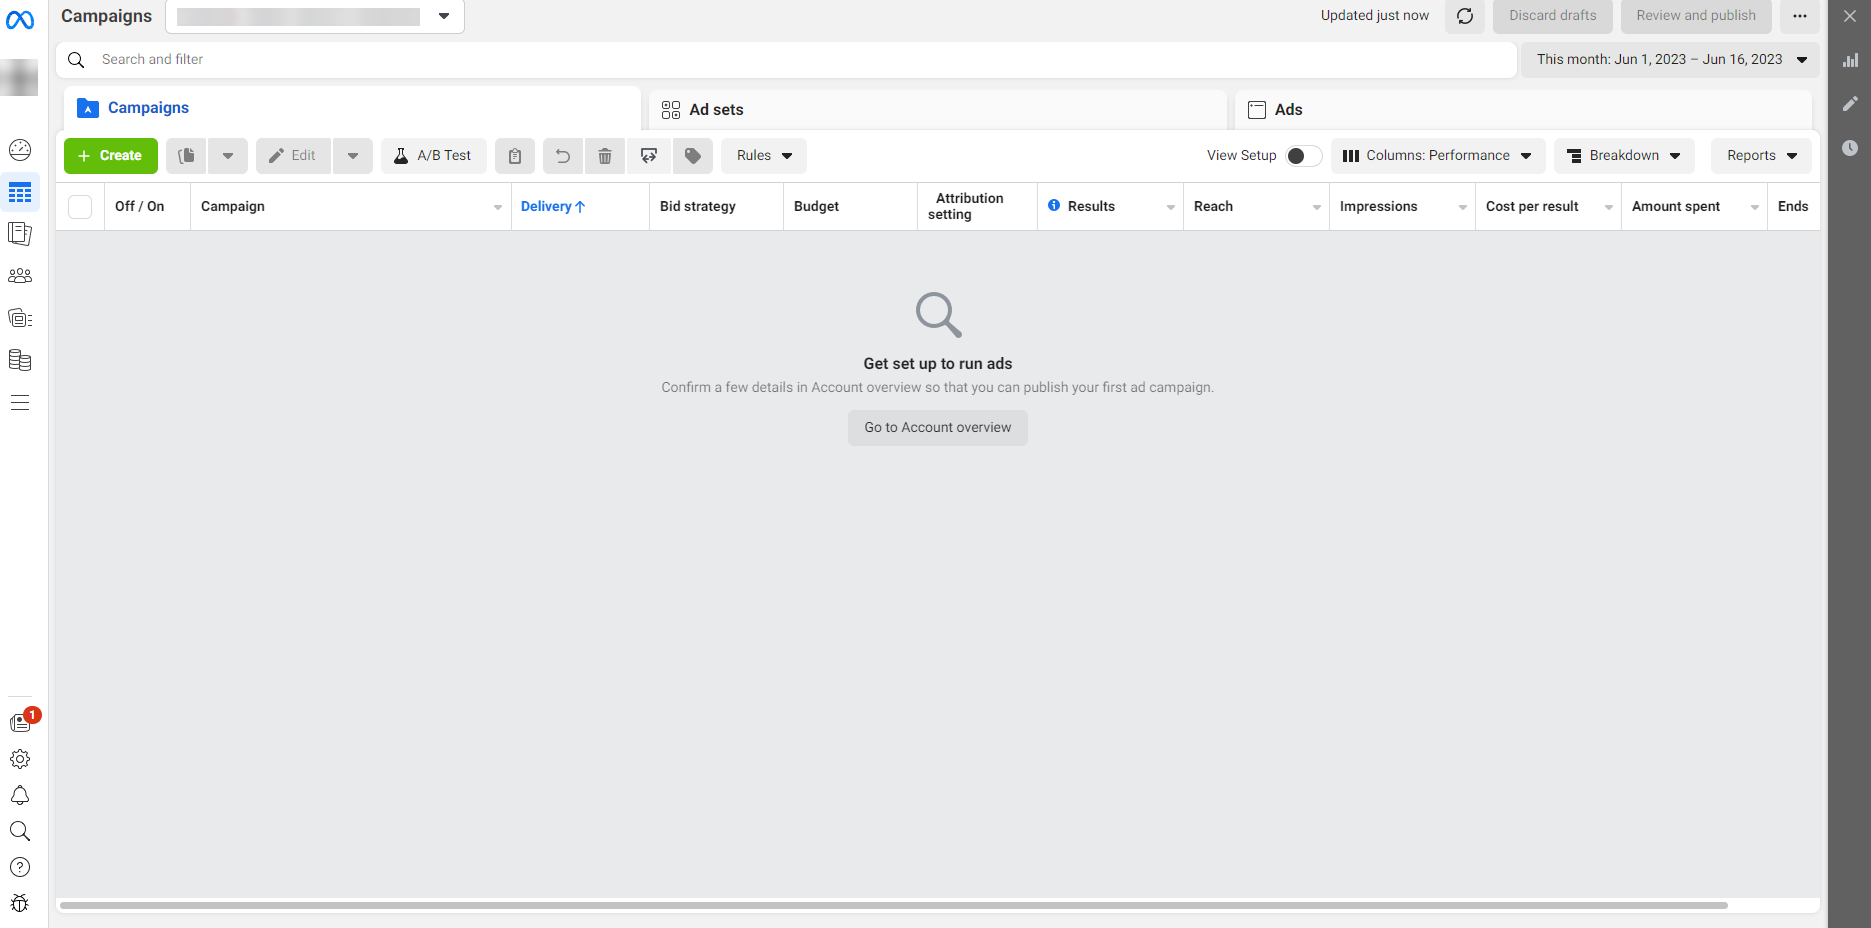
3. Click the Create button on the top left of the ad manager page.
4. On the Create a Campaign page, if you do not have your payment account linked, you can click the account overview button.
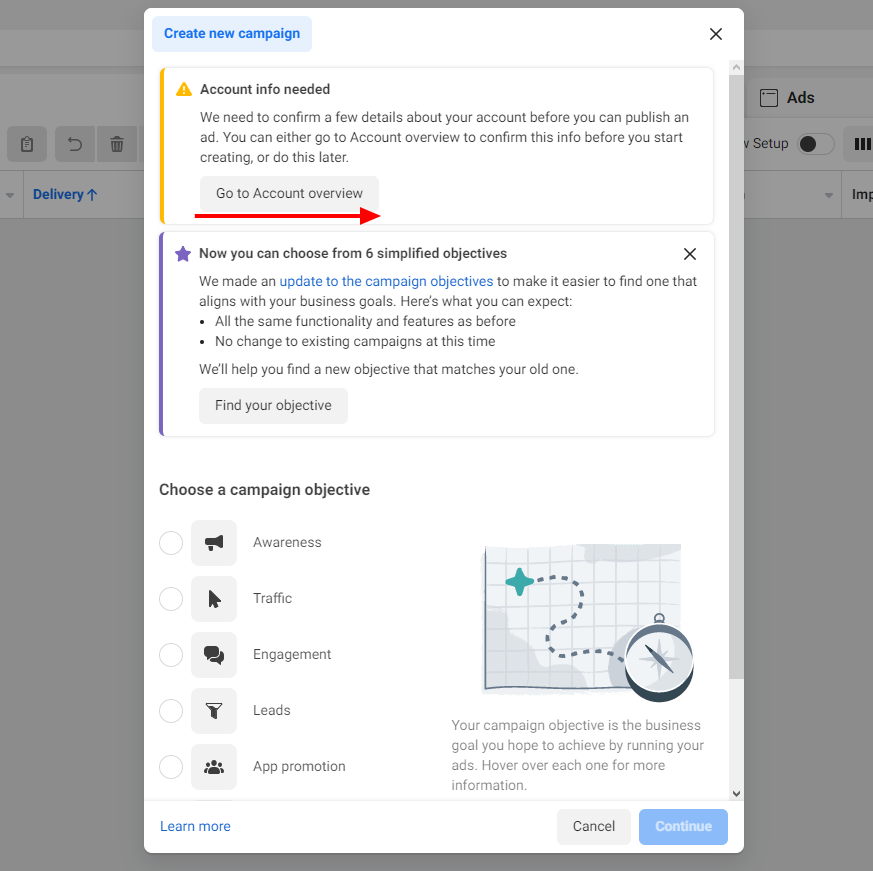
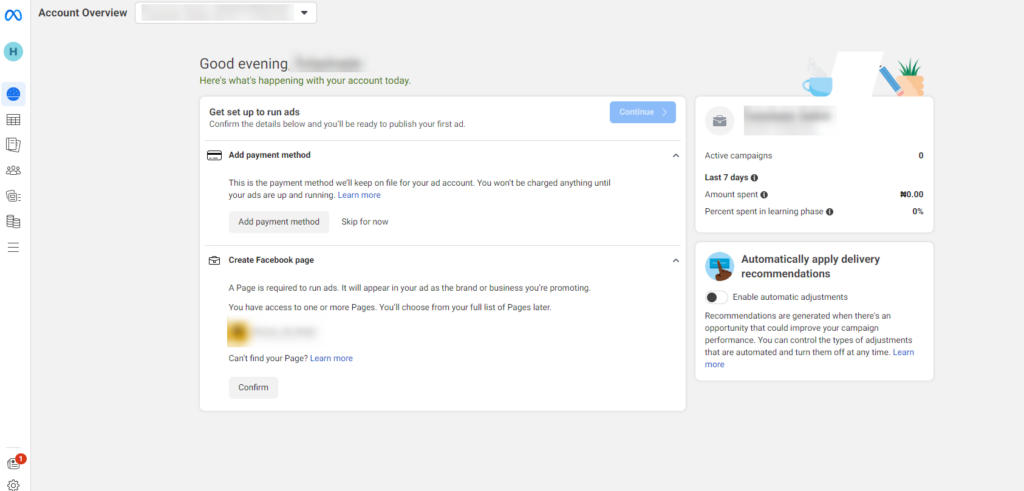
On the same page, click the confirm button to show if you have access to the page.
You will be redirected to the payment method channel where you can add a card for payment when you create an ad. Follow the guideline to add your card and save.
How To Solve Facebook Verification Issues – Start Verification Greyed/Ineligibility
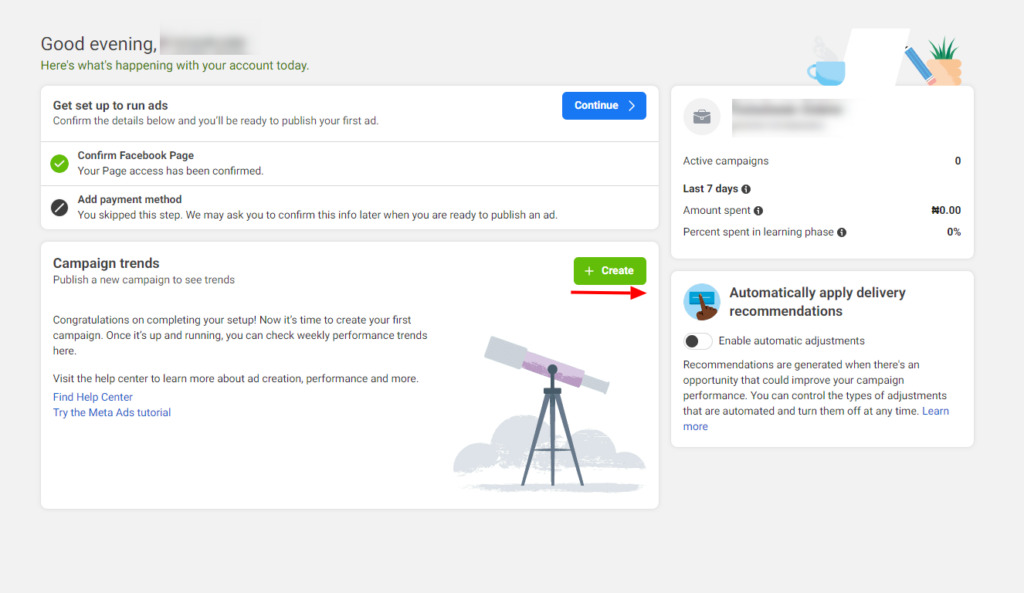
5. Click the Create button on the page to create your campaign. Or on the sidebar, click the campaign icon to take you back to the create campaign page. Go through the process in No. 3
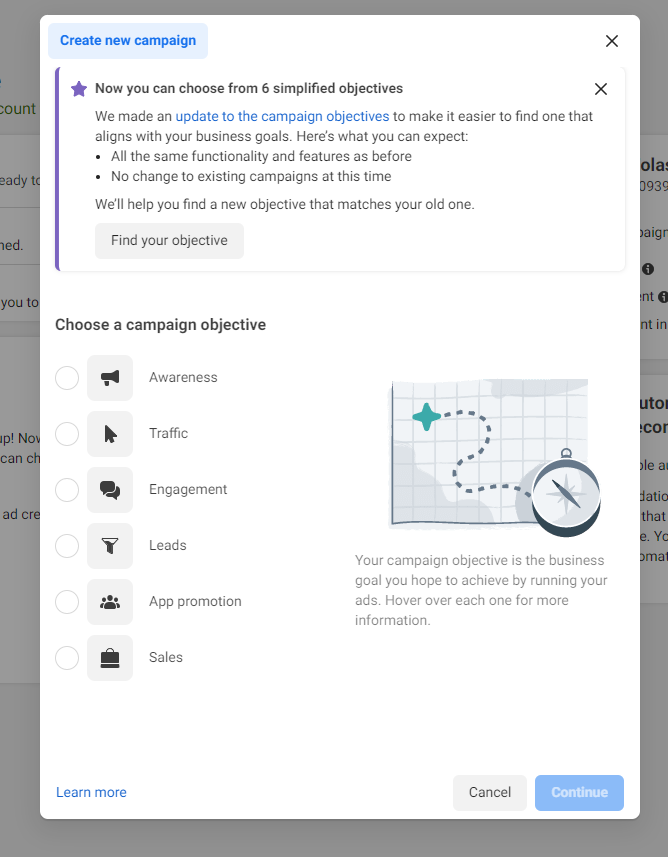
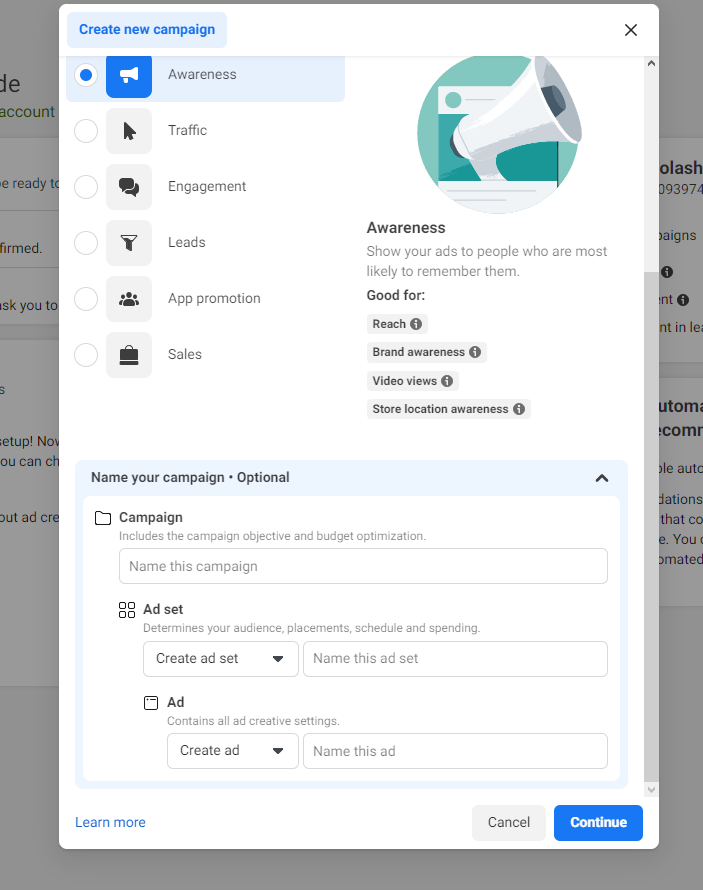
6. Choose your campaign objective. This depends on the goal of creating the ad. If what you want to achieve is engagement for your page, sales, traffic, awareness, and so on, you can choose your desired objective.
Each objective has its advantages, be sure you understand them before choosing. Know what works for your page before choosing any.
7. You can name your campaign to differentiate it especially when you have multiple ads running on your account.
Click the name of your campaign button and fill in the details. Click the continue button to go to the next stage.
8. Click the categories box to check if your ad fits any of the available options. If you can’t find your options there, you can skip that point.
Other information below like A/B test and Advantage campaign benefits can be activated if you feel they will be beneficial to your campaign. Toggle the button on to activate them. Then click next.
9. On this page we have key features like performance goals, a Facebook page, Bid control, dynamic creative, budget & schedule, audience, and placement.
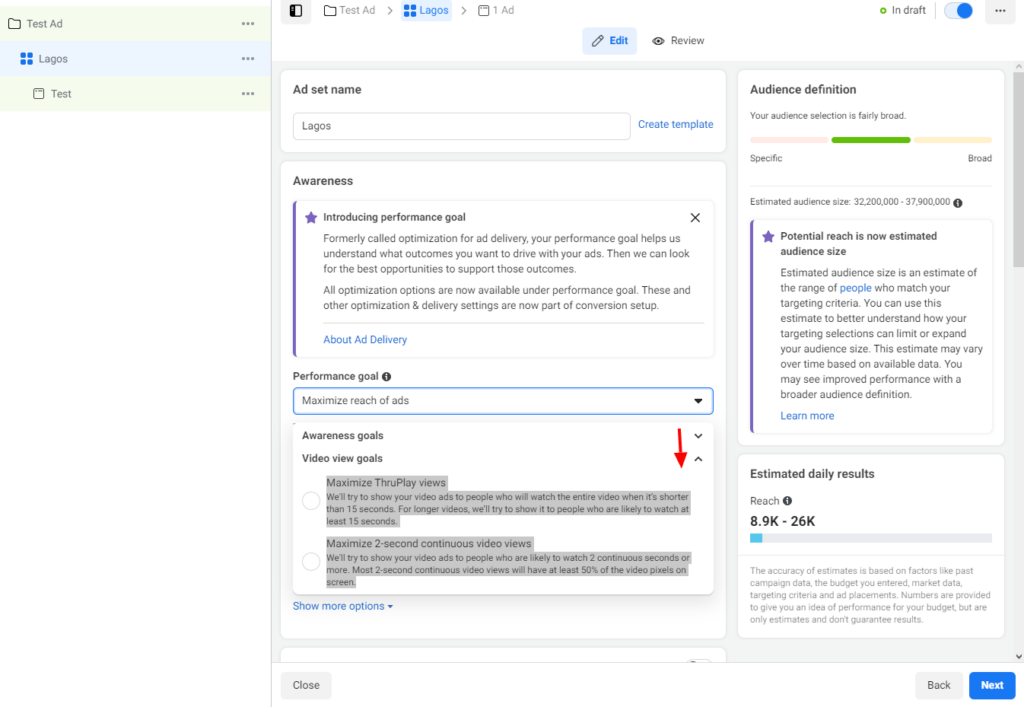
Performance goal: This is to measure the spread or impact of your campaign. We have the; awareness goals and video view goals
Awareness goals
– Maximize the reach of ads
We’ll try to show your ads to as many people as possible.
– Maximize the number of impressions
We’ll try to show your ads to people as many times as possible.
– Maximize ad recall lift
We’ll try to show your ads to people who are likely to remember seeing them.
Video view goals
-Maximize ThruPlay views
We’ll try to show your video ads to people who will watch the entire video when it’s shorter than 15 seconds. For longer videos, we’ll try to show them to people who are likely to watch at least 15 seconds.
– Maximize 2-second continuous video views
We’ll try to show your video ads to people who are likely to watch 2 continuous seconds or more. Most 2-second continuous video views will have at least 50% of the video pixels on the screen.
10. Choose the Facebook page you want the ad to run on. You can also use the + button to add multiple Facebook pages for the campaign.
Different Ways To Fund Your GT Domiciliary Account
Budget
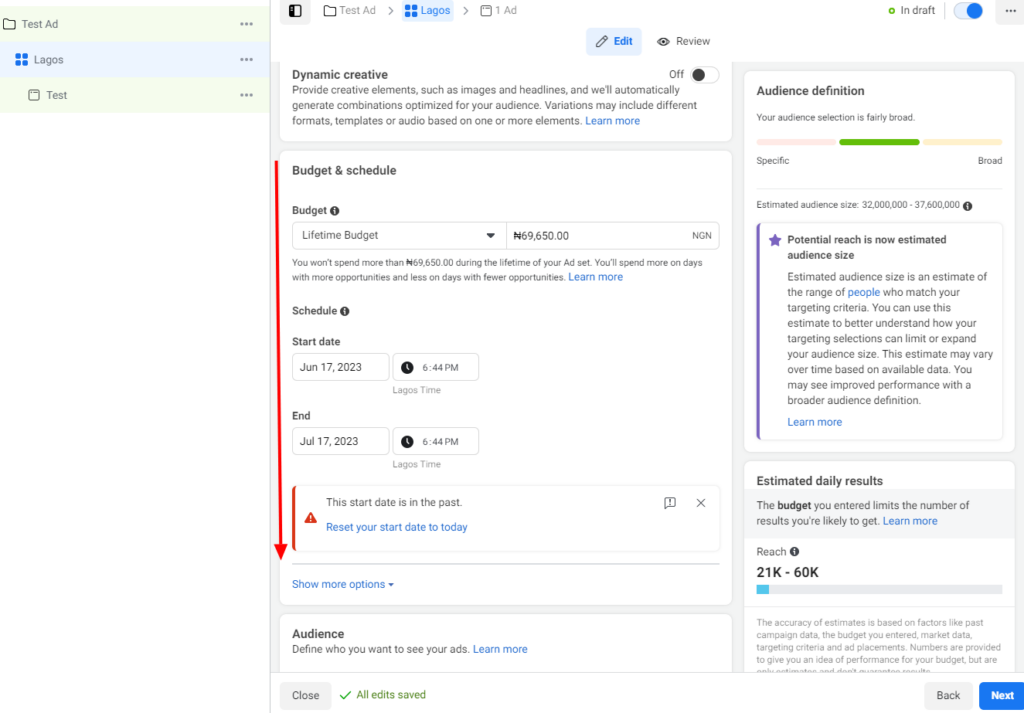
11. Go to the budget schedule tab to choose how much you want to allocate to each day or lifetime for your ads.
The lifetime budget means that you won’t spend beyond the specified amount for the number of days you want your ad to run.
Choose the ad duration with a start and end date and time.
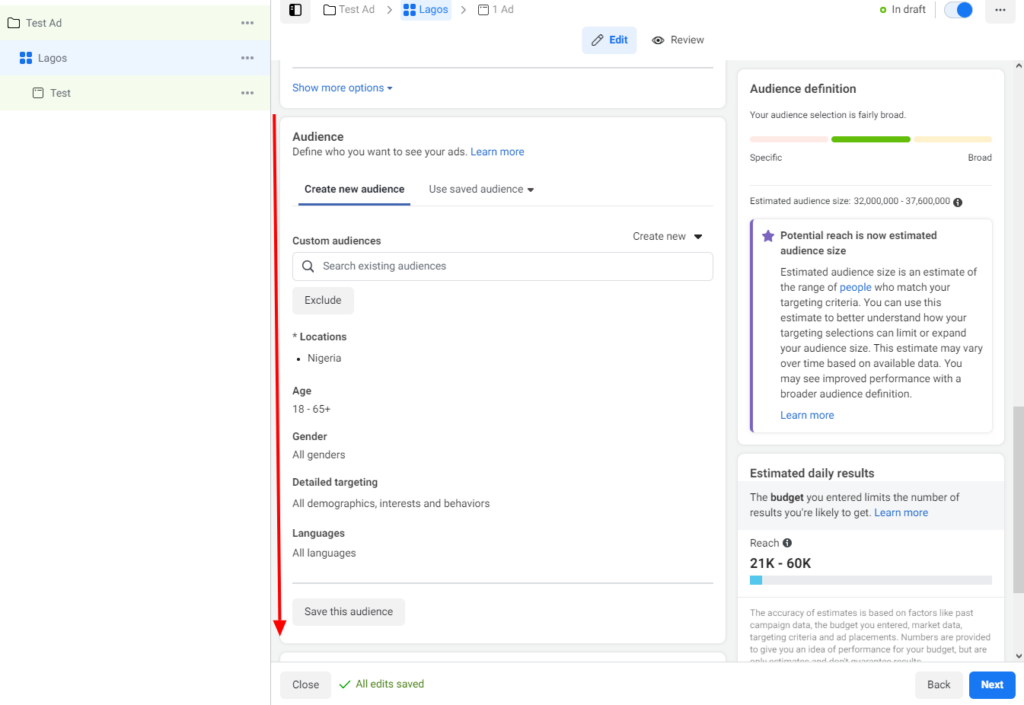
Audience
12. This tab has the demographic details of the type of people you want to reach with your ads. Choose the desired location, gender, interest, and languages you want to reach with your campaign.
You can click the Save this Audience button to store the settings for other campaigns.
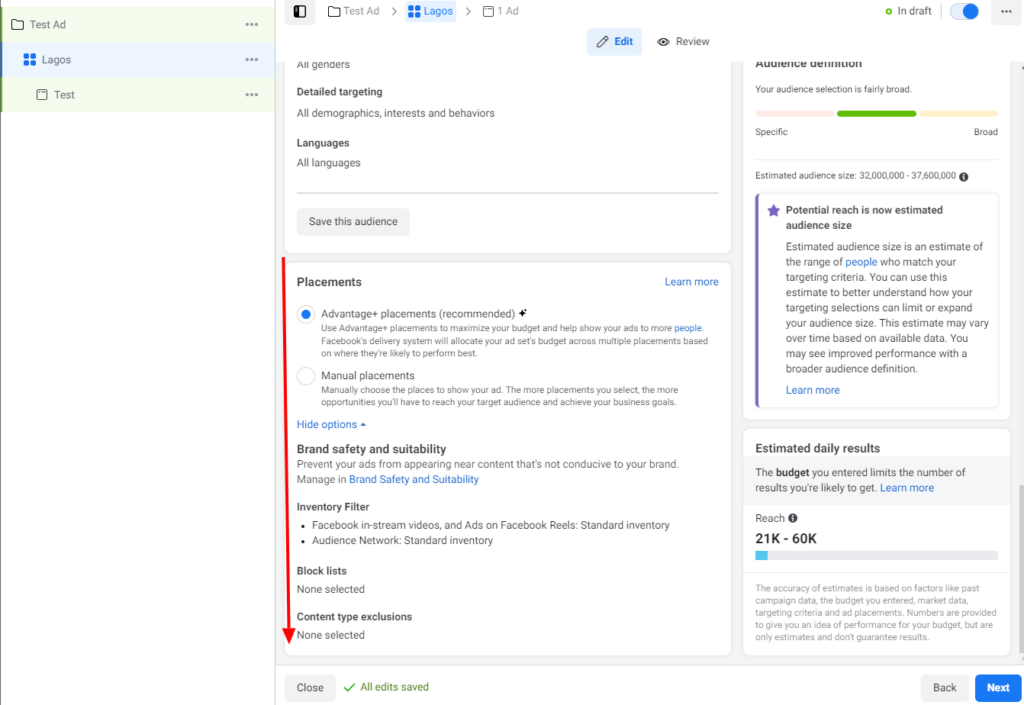
13. With the placement tab you can choose how effectively you want your ad to be run. Either by using a manual placement or Facebook algorithms determine where your ads will be displayed.
– Advantage+ placements (recommended)
Use Advantage+ placements to maximize your budget and help show your ads to more people. Facebook’s delivery system will allocate your ad set’s budget across multiple placements based on where they’re likely to perform best.
– Manual placements
Manually choose the places to show your ad. The more placements you select, the more opportunities you’ll have to reach your target audience and achieve your business goals.
How To Keep Accurate Record For SME Businesses
Choose or create a post for your campaign
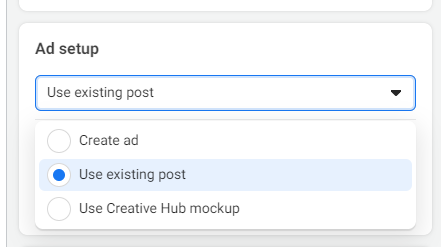
14. On the Ad Set up tab, you can choose or create a post to be used for your ad. If you want to use an existing post, click the use existing post and follow through the steps to choose the post.
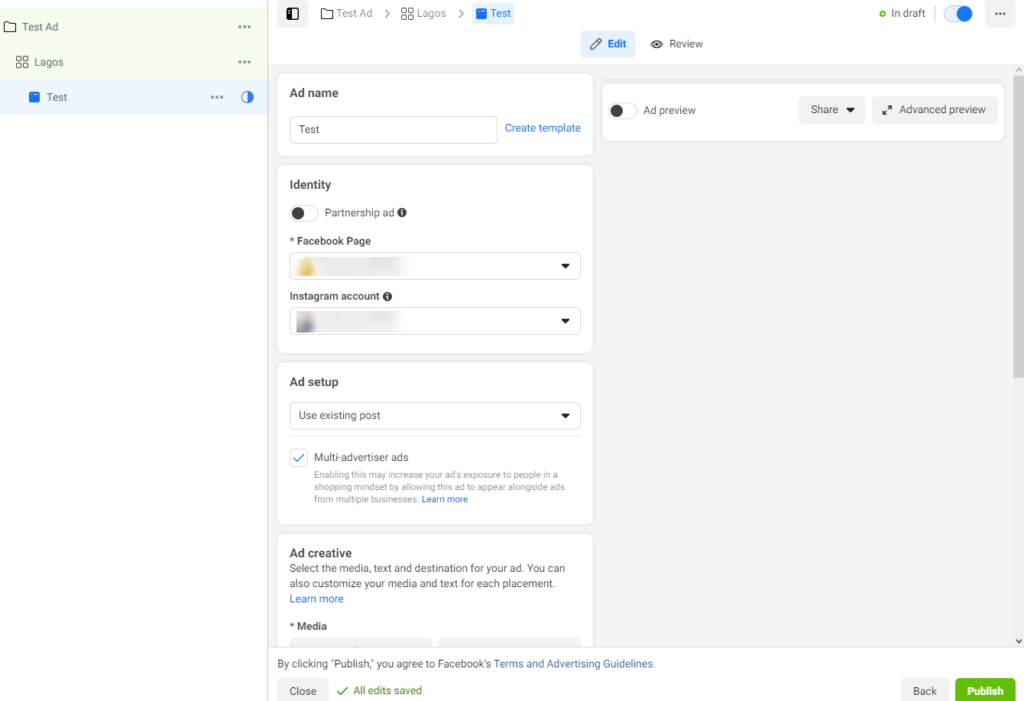
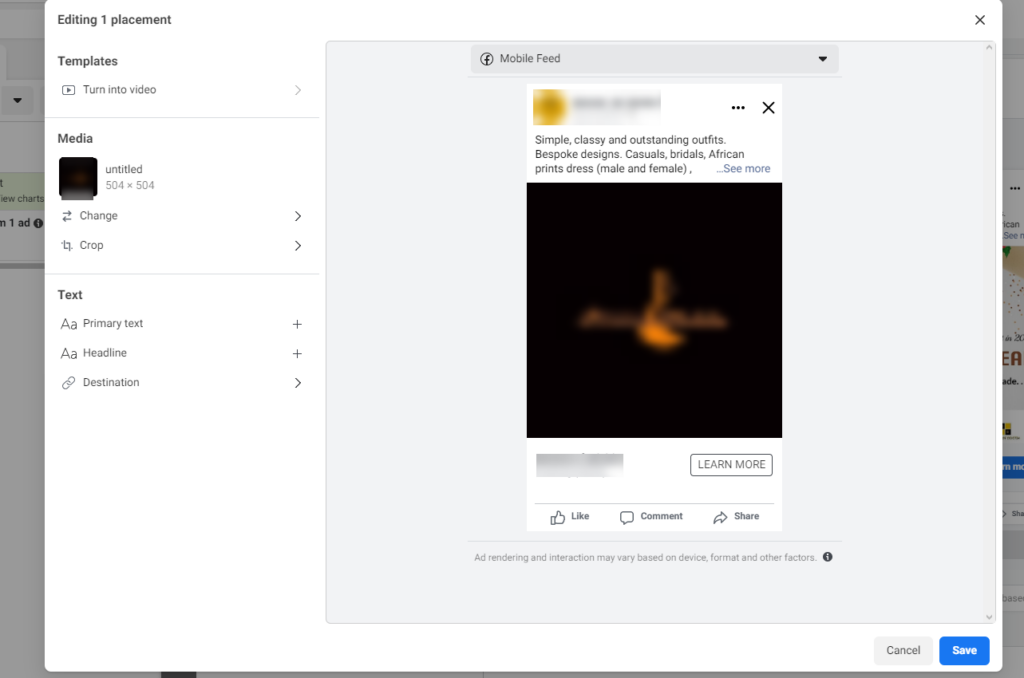
15. If you want to create new content, chose the create ad and click the edit button to change the text and image or video on the preview page.
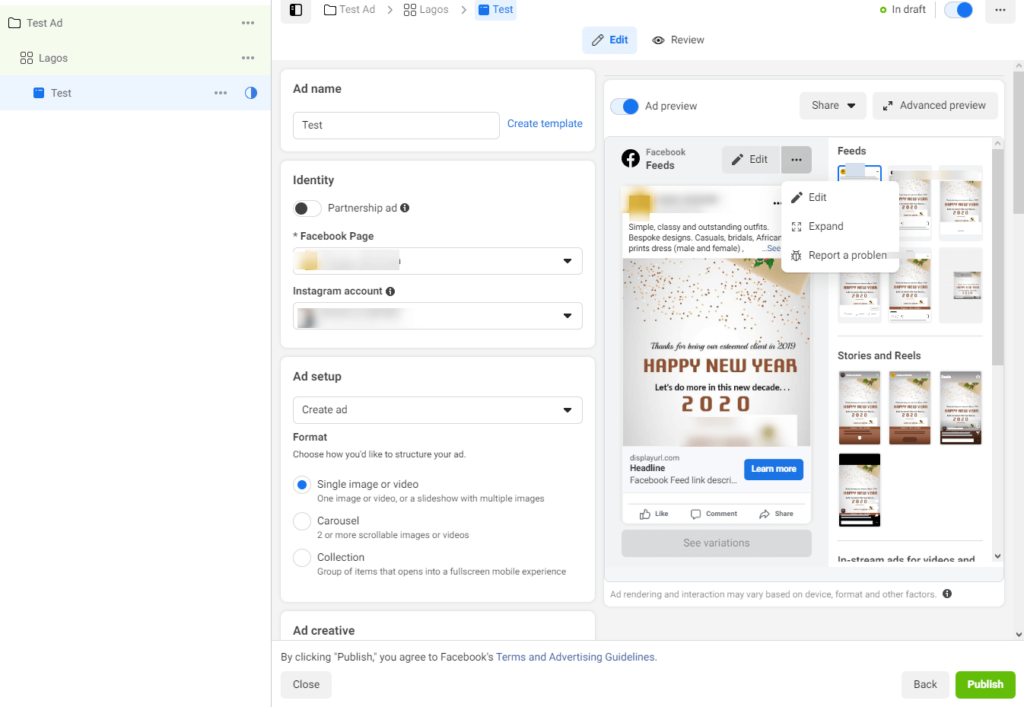
16. On the Ad Creative tab, you can choose to add music to your ad and ad placement.
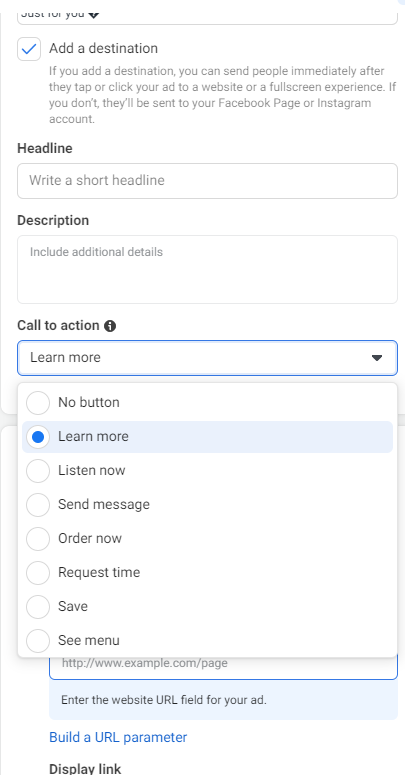
You can also add a call to action to your ad if you want your audience to take action like visit, learn more, or buy. You can as well add the description of the ad and a short headline.
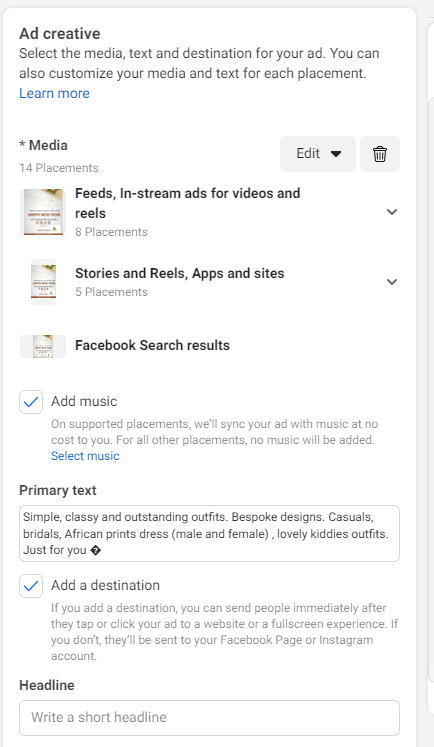
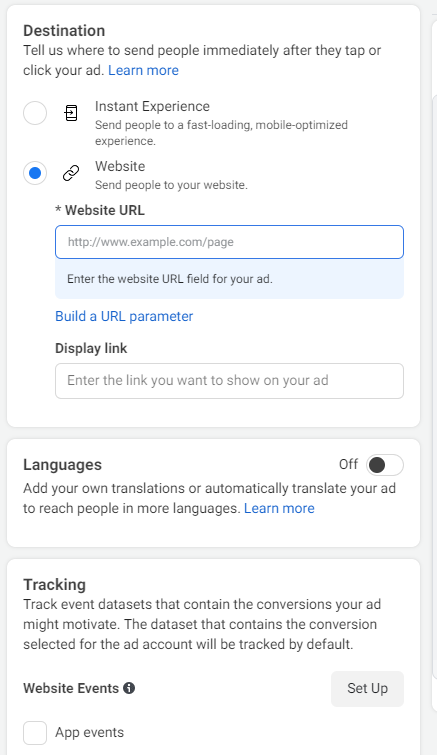
17. On the destination tab, if you have a website you want to drive traffic to or a link to track where the leads are coming from, you can enter the details on the Tracking tab as well.
 18. You should give your settings a second look before clicking the publish button.
